Frequently Asked Questions
How to Configure Mail Relay for Exchange 2003
|
|
To prevent any one
from discovering local accounts and to stop external systems from using
your Exchange 2003 Server as mail relay whilst allowing your internal
systems (like POPREP) to use your Exchange System for Mail relay follow
this instruction:
Disable all Authentication Protocols for Inbound Emails from Internet:
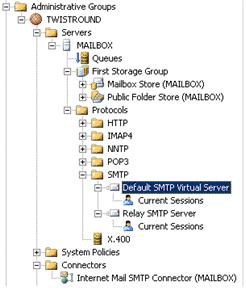
From the Exchange MMC Console, locate the default SMTP Virtual Server,
this is typically the connector that will be used when Exchange
communicates over internet.
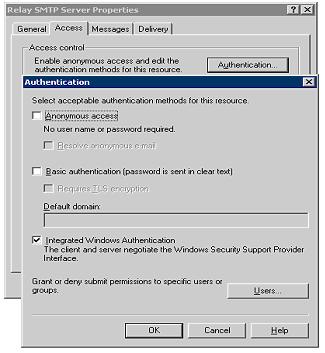
Select Properties,
and open the Access tab:
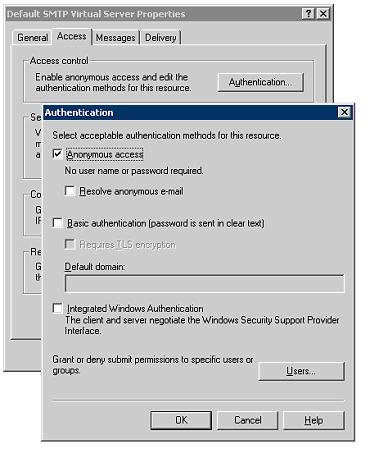
Uncheck Basic Authentication and
Integrated Windows Authentication.
This will prevent external systems
from discovering and cracking internal user accounts/passwords.
By default, Exchange will only allow
authenticated systems to relay emails, so by disabling authentication,
you are effectively disable your system from relaying emails.
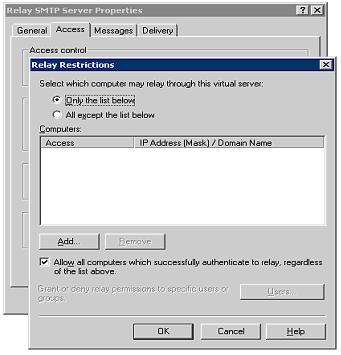
If you want to be sure that no relay
can take place, then you should click the Users button, and in
the Relay Restrictions dialog, you should select "Only the list below",
and then ensure the list is empty.
Next, select the
Delivery tab:
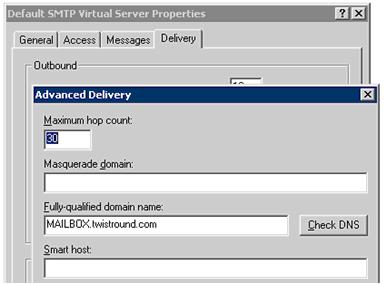
Configure the name under which you want your Exchange server to present
it self when connected to or from Internet:
You have now completed the changes of
the Default SMTP Virtual Server.
Configure an internal virtual server to accept and relay emails from
POPREP.
Using the Exchange Management console, create a new virtual server.
This connector
will be used internally only. It will allow internal systems to relay
mails to any Internal or External recipient. – As an extra line of
defence you should configure this connector to only allow authenticated
systems to send email through it.
It will not use the default SMTP port – as it’s already in use by the
default connector.
Name the new connector “Relay SMTP Server”
Confirm the message complaining that you are using the Same IP-Addresses
as the default Server.
Open the property
page of the new Server.
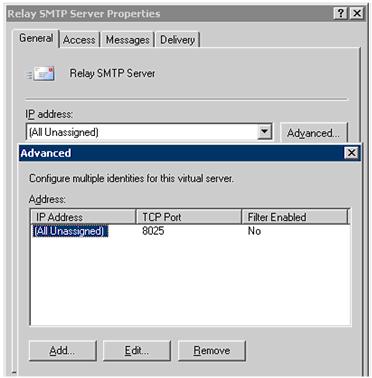
Select the General
tab, Advanced, there after Edit, and change the port to 8025.
Disable Anonymous
access, and enable Integrated Windows Authentication.
This will prevent
any one from using this server unless it logs on to the SMTP Server
using either Kerberos or NTLM. This precaution may not be necessary, but
either way no systems will be able to use this Server as a Mail Relay
unless authenticated.
Under Relay
Restrictions, keep the default settings. This will ensure that only
authenticated users can send Relay messages.
As this connection will be
used for inbound emails from POPREP, you may want to uncheck the limits
Message Size, Session Size and Number of messages per connection. – This
so that POPREP can deliver all queued messages immediately in one
session.

Set the Server
Name for this connection to se same as you use for the Default SMTP
Server.
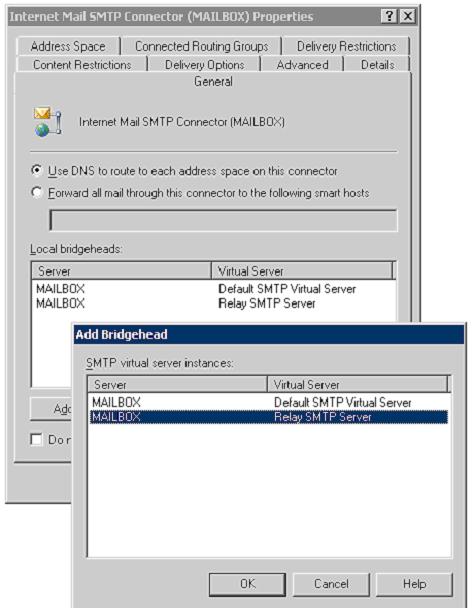
Finally, add the New virtual SMTP Server to your
Internet Mail SMTP Connector.
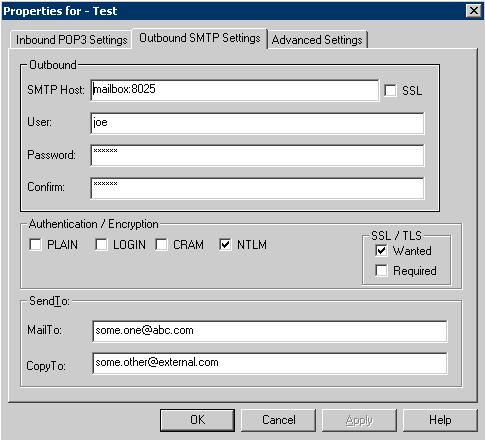
Configure POPREP to send to the Exchange Relay Virtual Server:
In the outbound settings tab, after the SMTP Host Name add :Port No.
In order to use the new virtual SMTP Server you just created use port
8025.
And – specify a username/password for a valid user in your domain. This
account will be used to log on to the SMTP Server.
Finally, enable NTLM – Authentication, and disable all other
authentication mechanisms.
Note, the POPREP – service will never forward an email back to the
original sender, as this typically would be seen as an attempt to spoof
the senders address resulting in a NDR, and potentially black listing
for your server.